
16 min read
The B2B Aluminum Windows Installation Guide: Ensuring Performance from Factory to Field
Even the most precisely engineered aluminum window will fail if the installation is flawed. We see this truth play out on projects worldwide: a beautifully fabricated frame, compromised by improper shimming, inadequate flashing, or overtightened anchors. From our factory floor in China, where we’ve spent over 20 years manufacturing solid wood doors and aluminum alloy windows, we understand that installation is the final bridge between our engineering and the building’s long-term performance.
This guide is written from our perspective—not as a generic how-to, but as a manufacturer’s blueprint for success. We’ll walk through pre-installation checks, step-by-step procedures, and post-installation verification, all framed by the specific capabilities and quality standards we build into every Jusen product. While this guide is comprehensive, our in-house engineering team is always available for project-specific technical support. If you hit a challenge that isn’t covered here, Contact Our Team directly.
—
Pre-Installation Preparation: The Manufacturer’s Checklist
Preparation prevents 90% of common installation issues—air leakage, water intrusion, and structural stress all trace back to what happens before the first screw is driven. In our experience supplying global contractors and developers, the projects that go smoothly are those where the installation team treats preparation as seriously as the installation itself.
Verifying Rough Openings and Tolerances
The rough opening is the foundation of your installation. Before any frame touches the opening, you must verify three critical dimensions: squareness, level, and plumb. A frame installed into an out-of-square opening will transfer stress to the glass and hardware, leading to operational failures and potential glass breakage down the line.
We recommend the following tolerances for standard installations:
| Check | Acceptable Tolerance | Measurement Method |
|---|---|---|
| Width & Height | ±1/8″ (3mm) | Tape measure at multiple points |
| Diagonal Difference | ≤1/4″ (6mm) | Measure corner to corner |
| Level (Sill) | ≤1/8″ over 3ft | 4ft level |
| Plumb (Jambs) | ≤1/8″ over 3ft | 4ft level |
Here’s where our Custom Size & Design capability becomes relevant. If your rough opening is off-spec and cannot be corrected, our factory can often manufacture frames to match your actual opening dimensions. We’ve done this for countless renovation projects where existing structures simply cannot be modified. However, for standard installations, the opening must be corrected before proceeding. Our engineering team can review your opening measurements and advise on the best approach—whether that’s adjusting the opening or having us fabricate a custom frame. Submit your dimensions through our Request Quote page and we’ll respond within 24 hours.
Inspecting Delivered Units for Shipping Damage
When your aluminum windows arrive on-site, the inspection process begins immediately. Even with the best packaging, transit across international borders can take a toll. At Jusen, we’ve implemented shipping damage protection protocols that include reinforced corner protection, foam sheeting between glass and frame, and wooden crating for large orders. But your team still needs to verify the condition upon receipt.
Follow this inspection checklist:
- Document the delivery — Photograph every crate before and during unloading. Note any visible damage on the Bill of Lading before signing.
- Unpack and inspect frames — Look for dents, scratches, or deformation in the aluminum profiles. Check that corner joints are tight and square.
- Inspect glass — Hold each insulated glass unit (IGU) up to light to check for seal failures, condensation between panes, or edge damage.
- Verify hardware — Check that all hinges, locks, and friction stays are present and operate correctly.
- Check accessories — Confirm that glazing beads, gaskets, and installation hardware are included.
If you discover damage, document it thoroughly with photos and report it to us immediately. Our after-sales support team will process replacements quickly to keep your project on schedule. We’ve streamlined this process because we understand that a delayed replacement can halt an entire construction timeline.
Gathering the Right Tools and Fixings
The tools you use directly impact the quality of the installation. Here’s our recommended toolkit for aluminum window installation:
- Shims — Use plastic or composite shims, never wood. Wood can absorb moisture, swell, and create pressure points that distort the frame. Plastic shims prevent galvanic corrosion and maintain consistent support.
- Anchors — Select anchors appropriate for your substrate. Concrete requires masonry anchors; steel or wood framing requires appropriate screws. Never mix metals that can corrode (e.g., aluminum against copper).
- Low-expansion foam — Use foam specifically rated for windows and doors. High-expansion foam can bow the frame and compromise the seal.
- Low-modulus sealant — Choose a sealant that allows for thermal movement. High-modulus sealants crack under expansion and contraction cycles.
- Levels and measuring tools — A quality 4ft level, tape measure, and a laser level for precision alignment.
- Drill with torque control — Over-tightening screws is a common error. A torque-controlled drill prevents frame distortion.
The distinction between shimmed and screwed installation is critical. Shimmed installation uses shims to level and plumb the frame, then anchors secure it in place. Screwed installation drives screws directly through the frame into the structure. We recommend the shimmed method for most applications because it allows for thermal movement and prevents stress transfer to the glass.
—
Step-by-Step Installation Process for Aluminum Alloy Windows
Now we move to the physical installation. This process aligns with the structural integrity of our aluminum alloy frames, which are precision-fabricated in our own aluminum processing workshops. When you’re working with a frame that’s manufactured to exacting tolerances, the installation steps become predictable and repeatable.
Positioning, Shimming, and Anchoring the Frame
Step 1: Prepare the opening. Clean the rough opening thoroughly. Remove debris, dust, and any protrusions that could interfere with the frame. Apply a pan flashing membrane at the sill area to protect against water intrusion.
Step 2: Position the frame. Center the frame in the opening, ensuring it’s level and plumb. Use a laser level to verify vertical alignment. The frame should be slightly narrower than the opening to allow for shimming (typically 1/4″ to 3/8″ gap on each side).
Step 3: Install shims. Place shims at specific support points:
- At each corner
- At the head and sill, approximately 6″ from each corner
- At intervals of 16″ to 24″ along the jambs
- At all anchor points
The shims transfer the weight of the glass to the structural framing. Never place shims only at the corners—this creates stress points that can warp the frame.
Step 4: Anchor the frame. Drill pilot holes and install anchors. Here’s the critical part: do not over-tighten. The anchor should be snug but not torqued. Over-tightening distorts the aluminum profile, which can:
- Bind the sash operation
- Compress the thermal break
- Create stress points that lead to frame failure
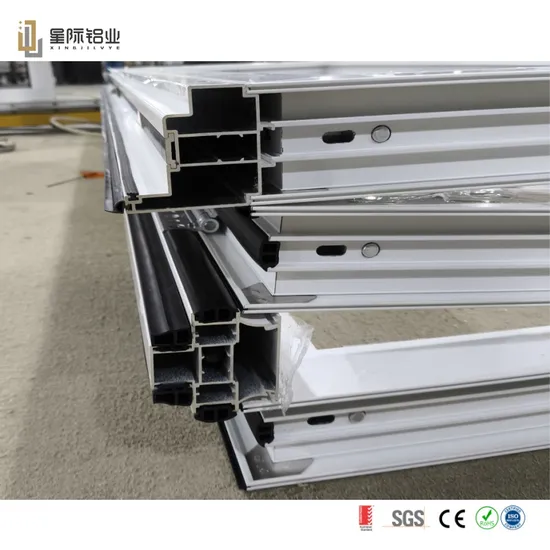
In our factory, we machine the frame profiles with precision drainage channels and reinforcement cavities. When you anchor through these areas, follow our shop drawings to avoid interfering with internal components. Our aluminum processing workshops ensure that corner fabrication is precise, which makes alignment significantly easier during this step. If you’re working with one of our custom profiles, our engineering team provides detailed anchoring recommendations as part of the shop drawing package.
Flashing and Waterproofing: The Critical Barrier
Water intrusion is the number one cause of aluminum window failure. The flashing sequence is non-negotiable:
- Pan flashing first — Apply a self-adhering membrane at the sill, extending up the jambs at least 6″. This creates a waterproof pan that catches any water that penetrates the exterior seal.
- Side flashing — Apply flashing tape up the jambs, overlapping the pan flashing.
- Top flashing — Apply the head flashing last, overlapping the side flashing. This shingle-lap sequence ensures water flows over, never behind, the flashing.
The exterior sealant is your final line of defense. Apply a continuous bead of low-modulus sealant between the frame and the building structure, tooling it to ensure full contact. Use a backer rod behind the sealant to control the depth and create a proper sealant joint.
This is where our quality control on raw materials matters. If the frame profile is compromised—if there’s a hairline crack or a poorly machined drainage hole—waterproofing fails regardless of how perfectly you apply flashing. Our frames are designed with proper drainage channels that direct water to the exterior weep holes. During installation, you must ensure these channels remain clear. Insulation foam or sealant that blocks the drainage path will cause water to pool inside the frame, leading to long-term damage.
Setting the Glass and Adjusting the Hardware
With the frame secured and waterproofed, it’s time to install the insulated glass unit (IGU).
Step 1: Install setting blocks. Place setting blocks at the bottom of the sash, approximately 1/4″ from each corner. These blocks support the weight of the glass and prevent direct contact between glass and aluminum.
Step 2: Position the IGU. Carefully lift the glass unit into the sash opening. Use suction cups for larger units. Ensure the glass is centered with equal space on all sides.
Step 3: Install glazing beads. Snap or screw the glazing beads into place, securing the glass. Do not overtighten—the glass needs some flexibility for thermal expansion.
Step 4: Adjust the hardware. This is where the quality of your supporting hardware accessories becomes apparent. We supply high-end hardware that requires precise adjustment for optimal operation:
- Friction stays — Adjust the tension so the sash stays in position at any angle. Too loose, and the sash will slam shut; too tight, and the hinges will wear prematurely.
- Multi-point locks — Verify that all locking points engage simultaneously. A misaligned lock creates uneven pressure on the gasket, reducing weather performance.
- Hinges — Check that the sash closes squarely against the frame. Adjust the hinge position if necessary.
Our hardware is selected for durability and smooth operation. But even the best hardware requires correct adjustment during installation. If you’re unsure about the adjustment specifications for a particular hardware set, our engineering team provides detailed instructions with every order.
—
Sealing and Insulation: Achieving Thermal and Acoustic Performance
The physical mounting is complete, but the performance envelope isn’t sealed yet. This phase determines whether your aluminum windows achieve their rated thermal and acoustic performance.
Interior vs. Exterior Sealant Application
The “wet seal” method involves applying sealant to both the interior and exterior of the frame-to-structure joint. But these two applications serve different purposes and require different materials:
Exterior sealant:
- Use a low-modulus, weather-resistant sealant (typically silicone)
- Apply over a backer rod to create a proper sealant joint
- Tool the sealant to ensure full adhesion on both sides
- The exterior seal is your primary water barrier
Interior sealant:
- Use a breathable sealant or acoustic sealant
- The interior seal is your air barrier and acoustic barrier
- It should be continuous and uninterrupted
Our engineering support team provides installation drawings that specify exactly where sealant should be applied to maintain our thermal performance ratings. We’ve designed our frame profiles with specific sealant grooves and application points. Following these drawings ensures you achieve the U-values and STC ratings that were specified for your project.
Insulating the Gaps with Foam
The gap between the frame and the rough opening is a thermal bridge. If left uninsulated, heat transfers directly through this gap, undermining the performance of the entire window assembly.
The correct approach:
- Apply low-expansion foam — After the exterior seal is in place, apply low-expansion foam from the interior side. Fill the gap completely but avoid overfilling—the foam should not bow the frame.
- Wait for the foam to cure — Do not trim the foam until it’s fully cured. Trimming too early can damage the frame or create gaps.
- Trim and apply interior sealant — Once cured, trim the foam flush with the frame and apply the interior sealant.
Here’s a manufacturer’s insight: because we offer OEM & ODM services, we often pre-drill holes or add specific profiles that make insulation easier. For custom projects, we can engineer the frame with insulation cavities that align with your building’s thermal envelope. This is a detail we work out during the design phase—if your project requires enhanced thermal performance, mention it during your initial Send Inquiry, and we’ll factor it into the profile design.
—
Post-Installation Inspection and Troubleshooting
The job isn’t done until it’s tested. A visual inspection isn’t sufficient—you need to verify the installation’s performance through field testing.
Water Spray Testing and Air Leak Checks
Water spray test:
- Spray the exterior of the installed window with a hose or spray rack for 5-10 minutes.
- Focus on the corners and joints where leaks are most likely.
- Check the interior for any water intrusion.
- Verify that drainage weep holes are functioning (water should exit through them).
Air leak check:
- Close the window completely.
- Run your hand along the perimeter of the sash—you should feel no drafts.
- For a more precise test, use an incense stick or smoke pen. Move it along the frame-to-sash interface. If the smoke wavers, there’s an air leak.
- Check the frame-to-structure seal as well.
Our strict quality control from raw materials to final production means we test every window in-house before it ships. We know the product is watertight and airtight when it leaves our factory. If a leak appears on-site, it is almost certainly an installation issue—and we can help you troubleshoot it. Send us photos and videos of the problem area, and our technical team will provide remote guidance to resolve the issue quickly.
Common Installation Mistakes and How to Avoid Them
Based on our years of experience supporting installation teams worldwide, here are the top three mistakes we see:
Mistake 1: Screwing through the frame without thermal break protection.
When you drill through a thermally broken aluminum frame, you can compromise the thermal break—the polyamide or PVC barrier that separates the interior and exterior aluminum sections. This creates a thermal bridge that reduces the window’s energy efficiency. Solution: Always follow our shop drawings. We mark the safe anchoring zones on each frame.
Mistake 2: Using the wrong shim material.
Wood shims are convenient, but they’re a mistake. Wood absorbs moisture, swells, and creates pressure points that distort the frame. Solution: Use plastic or composite shims exclusively. They’re inexpensive, non-corrosive, and provide consistent support.
Mistake 3: Removing shipping blocks too early.
We ship windows with temporary blocks that protect the glass and hardware during transit. Some installers remove these blocks immediately to inspect the window. This is fine for inspection, but the blocks should be reinstalled if the window won’t be installed immediately. The blocks prevent glass from shifting and hardware from being damaged. Solution: Keep shipping blocks in place until the moment of installation.
—
Why Installation Quality Matters for Your Project Liability
For B2B buyers—contractors, builders, and developers—installation quality isn’t just about performance. It’s about liability.
Protecting Your Warranty and Reputation
Improper installation voids warranties. This is a standard clause in virtually every window manufacturer’s warranty, and ours is no exception. When a window fails due to installation error, the cost of remediation falls on the installer, not the manufacturer.
For contractors, this means liability. A failed installation can lead to:
- Water damage claims
- Mold remediation costs
- Legal disputes
- Damage to your reputation and future bidding opportunities
As a manufacturer with 20 years of experience, we stand behind our product. We want our windows to perform flawlessly because your success is our success. That’s why we provide comprehensive after-sales support to help our partners resolve issues. If an installation challenge arises, we work with you to find a solution—protecting your reputation and ours.
The Role of the Manufacturer in Supporting Installers
The best installations happen when the manufacturer and installer work as a team. Here’s how we support our partners:
- Customized shop drawings — Our in-house design and engineering team provides detailed shop drawings within 24 hours of your inquiry. These drawings show exactly how our windows are constructed and where installation points are located.
- Pre-installation technical calls — For complex projects, we schedule technical calls to walk through the installation process with your team.
- On-site troubleshooting — If issues arise during installation, our technical team is available via phone, email, or video call to provide real-time guidance.
- Training resources — We provide installation training videos and documentation for our specific profile systems.
This support is built into our service model. When you partner with Jusen, you’re not just buying windows—you’re buying the expertise of a manufacturer that’s been in the business for over two decades.
—
Frequently Asked Questions
Q: What is the standard tolerance for a rough opening when installing aluminum windows?
A: Generally, we recommend a gap of 1/4″ to 3/8″ around the frame. This allows space for shimming and insulation while maintaining proper support. However, we can provide custom sizes if your openings are irregular. Our factory can manufacture frames to match your exact dimensions, which is particularly useful for renovation projects where existing openings can’t be easily modified.
Q: Should we use shims on aluminum windows?
A: Yes, absolutely. Shims are crucial for squaring the frame and transferring the weight of the glass to the structural framing. We recommend using plastic or composite shims to prevent galvanic corrosion. Never use wood shims—they absorb moisture, swell, and create pressure points that distort the frame.
Q: What is the difference between a “dry seal” and a “wet seal” installation?
A: A dry seal uses pre-formed gaskets that are compressed between the frame and the structure. A wet seal uses liquid sealant applied on-site. For high-rise or high-wind areas, we often recommend a combination—a wet seal on the exterior for water protection and a dry seal on the interior for air and acoustic control. Our engineering team can advise on the best method for your specific project.
Q: Can you provide installation instructions for your specific window models?
A: Absolutely. As part of our ODM services, we provide detailed installation drawings and instructions tailored to the specific profile system we manufacture for you. These drawings specify anchor locations, shim positions, and sealant application points. We can also provide video instructions for complex installations.
Q: How does Jusen support contractors if they face installation challenges on-site?
A: Our technical team is available to review photos and videos of the installation. We can provide remote guidance to resolve issues quickly, ensuring your project timeline is maintained. For complex challenges, we can schedule a video call with our engineering team to walk through the problem in real-time. This support is part of our comprehensive after-sales service—we don’t disappear after the product ships.
Q: What’s the difference between installing a fixed window versus a casement or awning window?
A: Fixed windows are simpler—no hardware adjustment is required, and the glass is set directly into the frame. Casement and awning windows require careful hardware adjustment to ensure the sash closes squarely and the seals compress evenly. For operable windows, we recommend testing the operation before the surrounding wall is finished, so any adjustments can be made while access is still easy.
Q: How do weather conditions affect installation?
A: Temperature matters significantly. Sealant and foam have temperature ranges for application—applying them outside their rated range compromises adhesion and performance. We recommend avoiding installation during heavy rain, as water can become trapped behind the flashing. If you must install in cold weather, use cold-weather-rated sealants and allow extra cure time.
—
Decision Guide: Choosing Your Installation Approach
Choose a standard installation if:
- Your rough openings are within tolerance (±1/8″ for width/height, ≤1/4″ diagonal difference)
- The building structure is sound and level
- You have a qualified installation crew with aluminum window experience
- Your project timeline allows for standard installation procedures
Choose a custom-engineered installation if:
- Your rough openings are significantly out of tolerance
- You’re working with unusual building materials (stone, precast concrete, curtain wall systems)
- Your project requires enhanced thermal or acoustic performance
- You need specific anchoring systems for high-wind or seismic zones
Choose Jusen as your manufacturing partner if:
- You want a manufacturer that understands installation from both the factory and field perspective
- You need OEM or ODM customization for unique project requirements
- You value responsive technical support and detailed shop drawings
- You want a partner with 20+ years of manufacturing expertise
—
Conclusion
Installation is the final quality control step—the moment where all the precision engineering and manufacturing quality either pays off or gets compromised. By following the preparation, installation, sealing, and verification steps outlined in this guide, you ensure that the aluminum windows you install perform exactly as designed.
At Jusen Doors & Windows Manufacturing Co., Ltd., we’ve spent over two decades perfecting both the manufacturing and the installation support side of the equation. Our in-house design and engineering team provides customized shop drawings within 24 hours. Our aluminum processing workshops ensure precision fabrication. Our quality control systems test every window before it ships. And our after-sales support team stands ready to help you through any installation challenge.
But the foundation of a successful installation is a high-quality, precision-manufactured product. That’s what we deliver—window systems designed for real-world performance, backed by a manufacturer that understands what happens after the product leaves the factory.
Ready to start your next project with a manufacturer that supports you from factory to field? Contact our team today for a free custom quote and let’s discuss how we can engineer the perfect window solution for your project.
—
References
- American Architectural Manufacturers Association (AAMA). “AAMA 2400-22: Standard Practice for Installation of Windows with a Mounting Flange in Stud Frame Construction.” https://aamanet.org/AAMA2400“>https://aamanet.org/AAMA2400
- Fenestration and Glazing Industry Alliance (FGIA). “Installation of Factory-Primed Windows.” https://fgiaonline.org/installation“>https://fgiaonline.org/installation
- International Code Council (ICC). “International Building Code (IBC) — Fenestration Requirements.” https://www.iccsafe.org/codes-tech-support/codes/2018-i-code/“>https://www.iccsafe.org/codes-tech-support/codes/2018-i-code/
- National Fenestration Rating Council (NFRC). “Understanding Window Performance Ratings.” https://www.nfrc.org/window-label/“>https://www.nfrc.org/window-label/
- U.S. Department of Energy. “Window Installation and Air Sealing.” https://www.energy.gov/energysaver/window-installation“>https://www.energy.gov/energysaver/window-installation