What Is a Door? Understanding the Basics
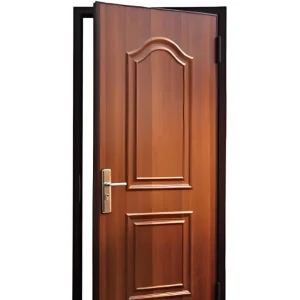
A door is a movable barrier that closes an opening in a wall, typically consisting of a frame, one or more panels or a solid slab, hinges, and operating hardware. Before you start building, you need to understand the core components: the stiles (vertical edge pieces), rails (horizontal pieces at the top and bottom), and panels (the inset sections that fill the space between stiles and rails). A panel door uses a frame-and-panel construction, while a flush door uses a solid or hollow core with a veneer surface.
Standard Door Sizes and Measurements
Getting the dimensions right is the foundation of any successful door build. Most residential doors in North America conform to standard sizes, which makes sourcing hardware and planning construction significantly easier.
| Door Type | Standard Height (inches) | Standard Width (inches) | Typical Thickness (inches) |
|---|---|---|---|
| Interior single | 80 | 30, 32, 36 | 1.375 – 1.75 |
| Exterior single | 80 | 36 | 1.75 |
| Double door set | 80 | 60, 64, 72 | 1.75 |
| Tall interior | 96 | 30, 32, 36 | 1.75 |
| Commercial | 84 | 36 | 1.75 |
When building a custom door, measure the rough opening—the framed gap in the wall—not the finished opening. For a standard 36-inch door, the rough opening should be approximately 38 inches wide and 82.5 inches high to accommodate the frame and shims. Always measure at three points: top, middle, and bottom for width, and both sides plus center for height. Use the smallest measurement as your reference point.
How to Build a Door: Step-by-Step Process
Materials and Tools Needed for Building a Custom Door
For a solid wood panel door, you will need:
- Wood: Kiln-dried lumber (oak, maple, mahogany, or pine) for stiles and rails; plywood or solid wood for panels
- Wood adhesive: Waterproof PVA glue for exterior doors
- Screws and dowels: For reinforcing joints
- Sandpaper: 80 to 220 grit
- Finish: Primer, paint, or varnish appropriate for your climate
Tools required include a table saw or circular saw, a router with a panel-raising bit, a thickness planer, clamps, a square, a tape measure, a chisel, and a mallet. A table saw is not strictly mandatory—you can cut straight edges with a circular saw and a straightedge guide, but accuracy will be harder to achieve.
Step 1: Measure and Cut the Stiles and Rails
Cut two stiles to the full door height and two rails to the door width minus the combined width of both stiles, plus the depth of your joinery. For a standard 80-inch tall, 36-inch wide door with 4-inch wide stiles, your rails would be approximately 36 inches minus 8 inches, plus 2 inches for tenons if using mortise-and-tenon joints.
Step 2: Create the Joints
The strongest joint for a panel door is the mortise and tenon. Cut a mortise (a rectangular slot) in the stiles and a corresponding tenon (a protruding tongue) on the ends of the rails. The tenon should be one-third the thickness of the wood. For example, on a 1.75-inch thick stile, the tenon would be approximately 0.6 inches thick and 1.5 to 2 inches long. A router with a straight bit and a chisel can accomplish this, or you can use a dedicated mortising machine for cleaner results.
Step 3: Cut and Fit the Panels
Panels should be approximately 0.25 to 0.5 inches smaller than the opening they fit into. This allowance is critical—solid wood panels expand and contract with humidity changes, so they must float freely within the frame grooves. If you glue a solid panel rigidly into place, it will crack as the wood moves. Use plywood panels if you prefer a more stable, warp-resistant option, or solid wood panels if appearance is your priority and you accept seasonal movement.
Step 4: Dry-Fit and Assemble
Assemble the door without glue first to verify all joints fit correctly. Check for square by measuring diagonally from corner to corner—both measurements should be equal. Disassemble, apply glue to the mortise-and-tenon joints only (never to the panels), and clamp the assembly. Use cauls—straight pieces of wood placed across the clamps—to distribute pressure evenly and prevent bowing.
Step 5: Sand and Finish
Allow the glue to cure for at least 24 hours, then remove the clamps. Sand the entire surface progressively from 80 to 220 grit. For exterior doors, apply a weather-resistant finish. Oil-based primers followed by high-quality exterior paint or a marine-grade varnish provide the best protection. For interior doors, polyurethane or lacquer works well. Always finish all six sides of the door, including the top and bottom edges, to prevent moisture absorption that causes warping.
Custom Door Options: Size, Style, and Materials
Building a custom door opens up options beyond what stock manufacturers offer. You can adjust the width to fit an unusual opening, incorporate glass panels for natural light, or match the door to existing architectural details.
Glass options range from single-pane to double-glazed insulated units. For exterior doors, use tempered or laminated glass with a low-E coating to improve energy efficiency. The glass is typically held in place with wooden stops—thin strips of molding that allow the glass to be replaced if broken.
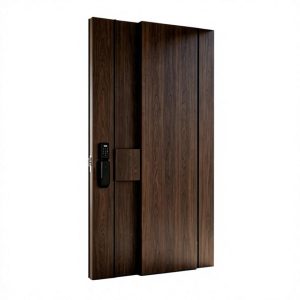
Material selection depends on your climate and application. Mahogany and cedar resist moisture naturally, making them suitable for exterior use. Oak and maple offer hardness but require proper sealing outdoors. For interior doors, poplar, pine, or MDF provide cost-effective options that accept paint well. If you are building a fire-rated door, note that most building codes require certified assemblies—a DIY door will not meet fire-rating standards.
Common Mistakes to Avoid When Building Doors
The most frequent errors in door construction relate to wood movement, joinery accuracy, and measurement. A door that sticks in summer and gaps in winter usually indicates panels glued too rigidly or insufficient clearance around the door edges. Leave a 1/8-inch gap on the sides and top, and 1/2 to 3/4 inch at the bottom for threshold clearance.
Joinery mistakes often come from rushing the mortise-and-tenon fit. A joint that is too tight will split the wood when clamped; too loose will create a weak bond. The tenon should slide in with moderate hand pressure—no hammer required.
Sagging occurs when the door is too heavy for its hinges or the frame is not square. Use three hinges for doors over 80 inches tall or weighing more than 40 pounds. Install the third hinge slightly above the center point, approximately 7 inches below the top hinge.
Related Considerations: Building Codes, Hardware, and Finishing
Building codes vary significantly by jurisdiction, and you must verify local requirements before constructing a door for a new opening. Egress codes typically require a minimum clear opening of 32 inches wide and 24 inches high when the door is open at 90 degrees. This means your actual door leaf may need to be wider than 32 inches to account for hardware projection.
Hardware selection affects both function and security. For exterior doors, use a deadbolt with at least a 1-inch throw and a strike plate anchored with 3-inch screws into the wall framing. Hinges should be ball-bearing for heavy doors, rated for the door weight.
Energy efficiency matters for exterior doors. A solid wood door provides reasonable insulation, but adding weatherstripping around the perimeter reduces air leakage. For extreme climates, consider a door with a foam-insulated core or an aluminum-clad exterior for durability with wood aesthetics inside.
When to Build vs. Buy: A Practical Comparison
Building a door from scratch is a rewarding project, but it carries real costs in time and materials. A simple interior panel door in pine might cost $100 to $200 in materials and require 15 to 20 hours of labor for a competent woodworker. An exterior hardwood door with glass will run $300 to $600 in materials and 30 to 40 hours of work.
Pre-hung doors from manufacturers cost $150 to $500 for interior units and $400 to $1,200 for exterior units, installed in a matter of hours. The trade-off is customization: building your own allows exact sizing, unique design, and material selection that stock options cannot match. If your opening is non-standard, your design requires specific glass or hardware, or you need to match existing millwork, custom construction makes sense.
How We Can Help with Your Custom Door Project
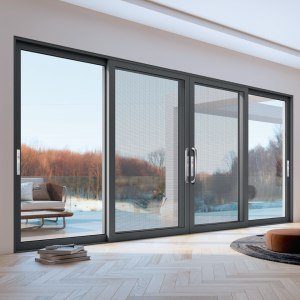
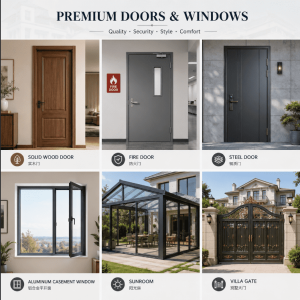
When a DIY build is not practical—whether due to time constraints, tool limitations, or the need for consistent quality across multiple doors—working with a manufacturer that specializes in custom fabrication is a practical alternative. As a factory-direct manufacturer, we build custom solid wood doors, thermal-break aluminum doors and windows, and system windows to your exact specifications.
Here is how we meet the standards discussed above. We handle full customization on size, color, glass, and hardware accessories, so you are not limited to standard dimensions. Our pre-shipment inspection includes air-tightness, water-tightness, and wind resistance testing, which addresses the energy efficiency and durability concerns covered earlier. For buyers managing construction projects, we provide adjustable profile structures and fittings to match local building codes in your target market, plus full customs documentation and FCL or LCL shipping options.
If you need doors built to specification without the learning curve of DIY construction, our team can produce consistent, code-compliant units at factory-direct pricing. OEM and ODM services are available for businesses that need private labeling or custom designs.