Content Menu
● 1. Understanding the Difference: Pre-Hung vs. Slab Doors for Your Project
● 2. Pre-Installation Checklist: What to Verify Before You Start
● 3. Step-by-Step Installation: Pre-Hung Solid Wood Doors
● 4. Step-by-Step Installation: Slab Doors for Renovation Projects
● 5. Common Installation Mistakes That Void Your Warranty
● 6. Why Material Selection Impacts Installation Success
● 7. Ensuring Long-Term Performance: Post-Installation Maintenance
● 8. Frequently Asked Questions
● 9. Choosing the Right Door Type for Your Project
12 min read
When a container of solid wood doors arrives at a job site in Arizona, the temperature is often 110°F. The wood has been kiln-dried to 8% moisture content in our factory. Three days later, a contractor calls us because a door won’t close properly. The wood didn’t fail. The installation method did—the crew hung the door before the slab could acclimate to the desert climate.
We have seen this scenario play out across dozens of countries. Our engineering team has spent 20 years manufacturing solid wood entry doors, interior wooden doors, and aluminum windows for global contractors, interior designers, and villa real estate developers. We have also spent a significant portion of that time troubleshooting installation failures that trace back to a single mistake: skipping the preparation phase.
This guide covers the professional step-by-step process for installing both pre-hung and slab doors. It is written for contractors, builders, and renovation specialists who need consistency across multiple units—not just a single DIY project. Let’s get into it.
Understanding the Difference: Pre-Hung vs. Slab Doors for Your Project
The choice between a pre-hung and a slab door is not about preference. It is about the condition of the rough opening and the scale of your project.
Pre-Hung Doors (Factory-Assembled Efficiency)
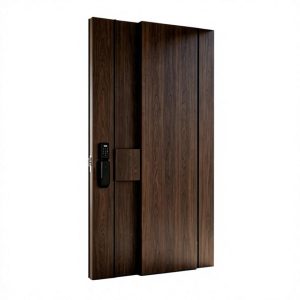
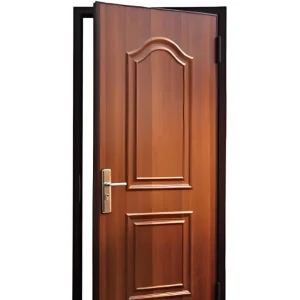
A pre-hung door arrives with the door slab already mounted on a timber frame. The hinges are mortised, the strike plate is installed, and the jamb is assembled. For new construction—especially villa projects where we supply dozens of units per order—this is the faster path.
Our factory pre-hangs doors on premium timber frames. We do this because we can guarantee that the jamb and door are perfectly square before the unit leaves our workshop. When the unit arrives on-site, your crew does not need to measure hinge locations or route mortises. The precision work is already done.
From our experience working with high-volume builders, the time savings are substantial. A crew can install a pre-hung unit in 45–60 minutes. A slab door installation takes two to three times longer. If you are managing a 50-unit apartment complex, that difference matters.
Slab Doors (Customization Flexibility)
A slab door is just the door itself—no frame, no hinges, no hardware. This option suits renovation projects where the existing frame is structurally sound but the door needs replacement. Think historical buildings, non-standard openings, or projects where the client wants to keep the original frame.
Our OEM & ODM services allow us to cut slabs to exact custom sizes. If a building was constructed in 1920 with 31.5-inch openings, we can manufacture slabs that fit perfectly. We have done this for retail dealers who supply renovation contractors across Europe and North America.
The trade-off? Slab installation demands more skill on-site. You are responsible for fitting, routing, and hanging. If your crew is not confident with a router, stick with pre-hung units.
Pre-Installation Checklist: What to Verify Before You Start
We will state this plainly: 90% of installation failures we see are not the door’s fault. They are preparation failures. The rough opening was measured wrong, the floor was not level, or the crew used the wrong fasteners.
Measuring the Rough Opening (RO)
The rough opening is the framed gap in the wall where the door unit sits. For a pre-hung door, the rule of thumb is 2 inches wider and 2.5 inches taller than the door slab. A 36-inch door needs a 38-inch rough opening width. The height should be 84.5 inches for a standard 82-inch door.
But do not trust the rule of thumb alone. Our technical team provides exact specifications in our shop drawings, which we issue within 24 hours for project partners. These drawings account for our specific frame profiles, which may differ from generic industry standards.
Checking for Plumb and Level
A floor that is out of level by 1/4 inch will cause a door to swing open or closed on its own. Use a 4-foot level to check the floor across the opening. If the floor slopes, you have two options: shim the low side of the frame or scribe the door to match the floor profile.
For the header (the top of the opening), check that it is level. If it is not, you will need to adjust your shimming strategy. We have seen installers force a frame square with excessive shims, only to create a door that binds against the jamb. Shim gently. The frame should sit naturally in the opening.
Tools and Materials Required
Here is what your crew needs on-site:
- 4-foot level (a 6-foot level is better for taller doors)
- Shim wedges (plastic or cedar)
- 3-inch and 2.5-inch screws (match to frame material)
- Low-expansion polyurethane foam
- Router with a mortising template (for slab doors)
- Circular saw or handsaw for trimming shims
- Hammer
- Tape measure
- Pencil
- Safety glasses
One note on screws: we supply supporting hardware accessories with our doors. The screw lengths are matched to our specific frame materials. If you substitute screws, you risk either splitting the frame or failing to penetrate the wall stud. Neither outcome is good.
Step-by-Step Installation: Pre-Hung Solid Wood Doors
Solid wood doors are heavy. A 36-inch solid hardwood entry door can weigh anywhere from 80 to 120 pounds, depending on the species and thickness. This weight changes how you handle the installation.
Step 1 – Positioning the Unit
Lift the pre-hung unit into the rough opening. Place shims behind the hinge locations at both the top and bottom. Close the door partway to check the reveal—the gap between the door and the frame. It should be even from top to bottom.
Because we use high-end solid wood, our doors require a minimum of three hinges per unit. We pre-install these at the factory. This saves your crew time and eliminates the risk of a door sagging because an installer decided two hinges were enough.
Step 2 – Securing the Hinge Side
Starting with the top hinge, drive a 3-inch screw through the jamb, through the shim, and into the wall stud. Do not over-tighten. The screw should pull the jamb snug against the shim, but you should not feel the frame flex.
Work your way down the hinge side, checking plumb with each screw. If the jamb is not plumb, adjust the shims before driving the next screw.
Step 3 – Aligning the Strike Side
Close the door. Check the gap between the door and the strike-side jamb. It should be consistent—typically 1/8 inch. If the gap is too tight or too wide, adjust the strike-side jamb by adding or removing shims.
Secure the strike side with screws driven through the jamb into the stud. Then test the latch. It should engage smoothly without forcing. If the latch does not align with the strike plate, you may need to adjust the plate slightly—a common micro-adjustment after installation.
Step 4 – Insulating and Finishing
With the door hanging correctly, install the weather-stripping around the perimeter of the jamb. Then apply low-expansion polyurethane foam between the jamb and the rough opening. This seals the gap and provides insulation.
Here is where our factory finish pays off. We apply advanced spray finishing in our workshop, which produces a durable topcoat cured under controlled conditions. Field-applied finishes are rarely as hard or as uniform. When our doors arrive, they are ready for installation without extensive on-site touch-up. For entry doors exposed to weather, this factory-applied finish is the difference between a door that lasts 10 years and one that lasts 5.
Step-by-Step Installation: Slab Doors for Renovation Projects
Slab installation is precision carpentry. There is no frame to hide your mistakes.
Step 1 – Fitting the Slab to the Existing Frame
Measure the existing frame opening at the top, middle, and bottom. Frames are rarely perfectly square. Transfer these measurements to the slab, leaving a 1/8-inch gap on the sides and top, and a 1/2-inch gap at the bottom for floor clearance.
Mark the slab and plane it down to size. Use a sharp plane and take light passes. Removing too much material at once can tear the wood grain.
This is where our wood drying process proves critical. Our in-house drying workshop stabilizes the wood to a consistent moisture content before machining. A slab that has been properly dried will not warp after being cut down. We have seen lesser manufacturers skip this step, and the result is a door that cups or twists within weeks of installation.
Step 2 – Routing for Hinges and Lockset
Use a router with a mortising template to cut hinge recesses. Mark the hinge positions carefully—typically 7 inches from the top and 11 inches from the bottom for a standard door. The recess should be shallow enough that the hinge sits flush with the door edge.
For the lockset, drill the cross bore and edge bore. Use sharp router bits. Solid wood burns easily with dull bits, leaving dark marks that cannot be sanded out without changing the door profile.
Step 3 – Hanging and Adjusting
Attach the hinges to the door first, then hang the door on the existing frame. Adjust the strike plate position as needed. A properly hung door should stay in place when opened to any position—it should not swing open or closed on its own.
Common Installation Mistakes That Void Your Warranty
We want to be direct about this: our warranty covers manufacturing defects. It does not cover installation errors. Over the years, we have seen the same mistakes repeat across job sites. Here are the ones that void coverage.
Over-Shimming and Frame Distortion
Shimming is meant to fill gaps, not to force a frame into shape. If a frame is out of square and you use excessive shims to pull it flat, the door will bind. Our quality control process checks for squareness before the door leaves the factory. If a door binds after installation, it is almost always an on-site distortion issue.
Incorrect Fastener Length
Screws that are too long can penetrate exterior cladding. Screws that are too short do not reach the wall stud. Both are problems. Use the fastener lengths specified in our shop drawings. If you are working with an existing frame, verify the wall construction before choosing screw lengths.
Ignoring Acclimation
Solid wood is hygroscopic—it absorbs and releases moisture based on the surrounding environment. If you install a door immediately after it arrives from a humid factory environment into a dry desert climate, the wood will move. We provide acclimation guidance based on your climate zone. For our global clients, this is a standard part of our technical support. Let the door sit in the installation environment for at least 48 hours before hanging.
Why Material Selection Impacts Installation Success
The material you choose determines how forgiving the installation process will be.
Solid Wood vs. Engineered Wood
Solid hardwood doors are beautiful. They are also heavy and responsive to humidity changes. For luxury villa projects, the aesthetic is unmatched. But for commercial projects where the building has variable HVAC performance, engineered wood doors are more forgiving. The engineered core resists warping in fluctuating humidity.
We manufacture both. Our range spans solid hardwood for high-end residential and engineered wood for commercial and hospitality projects. The installation process differs slightly—engineered doors are lighter, so they handle easier. Solid wood doors require more careful shimming to account for weight distribution.
Factory Finishing vs. Site Finishing
We touched on this earlier, but it deserves emphasis. Our spray finishing workshop applies coatings in a dust-controlled environment with precise curing times. The result is a harder, more uniform finish than anything applied on a job site. A factory finish also means no drying time on-site—your crew can install the door and move to the next unit immediately.
For high-moisture areas like coastal regions, we recommend our factory finishing with marine-grade sealers. This is not a feature we mention lightly. We have seen what salt air does to field-finished doors. It is not pretty.
Ensuring Long-Term Performance: Post-Installation Maintenance
The installation is done. The crew has packed up. But the door needs attention throughout its life.
Adjusting for Seasonal Movement
Solid wood expands in summer and contracts in winter. If a door starts sticking in July, do not plane it. Adjust the strike plate slightly or check the hinge screws for tightness. A door that fits perfectly in winter may bind in summer—this is normal behavior for solid wood.
Hardware Lubrication
Use graphite powder on locks, not oil. Oil attracts dust, which builds up and causes the mechanism to stick. Graphite is a dry lubricant that does not attract debris. A small tube of graphite powder per door will last years.
Frequently Asked Questions
What is the standard rough opening size for a 36-inch pre-hung door?
Typically 38 inches wide by 84.5 inches high. But this is a starting point, not a rule. We always provide a custom shop drawing to verify dimensions against our specific frame profiles. The drawing eliminates guesswork.
Can I install a solid wood slab door on an existing metal frame?
Yes, but it requires a specialized adapter frame. A metal frame has different dimensions and mounting points than a timber frame. We can custom-manufacture timber frames to retrofit into metal bucking. This is a common request for commercial renovations where fire-rated metal frames are already in place.
How long does it take to install a pre-hung door?
For a professional crew, 45 to 60 minutes per unit. Our factory pre-drilling and mortising reduces this time significantly compared to a door that requires on-site routing.
Do you provide installation instructions with bulk orders?
Yes. We provide digital and printed guides for every bulk supply project. For complex villa projects, our engineering team is available for video consultations. We do this because we want the installation to succeed as much as you do.
What is the MOQ for custom-sized doors?
We offer flexible MOQs for global distributors. You can order custom sizes without committing to massive inventory. This is part of our approach to serving retail dealers and construction project partners who need variety without excess stock.
Choosing the Right Door Type for Your Project
Here is a decision guide based on what we have seen work across hundreds of projects.
Choose a pre-hung door if:
- You are working on new construction with standard rough openings
- Your crew needs to install multiple units quickly
- You want factory-guaranteed squareness and hinge alignment
- The project involves exterior entry doors where weather sealing is critical
Choose a slab door if:
- You are renovating a building with existing sound frames
- The openings are non-standard or historical
- You want to preserve the existing frame and trim
- Your crew has solid routing and fitting skills
Wooden doors are not always the cheapest option. For high-humidity areas, buyers should prioritize moisture resistance over appearance. A mahogany entry door in a coastal environment will require more maintenance than a fiberglass alternative. But if the aesthetic matters—and for villa projects it usually does—a properly manufactured and installed solid wood door is worth the investment.
Partnering with Jusen for Your Next Project
A successful installation starts with a precision-manufactured product. As a manufacturer, we control the entire process—from wood drying to final spray finishing. This means the door you receive is ready for a flawless install, provided your crew follows the steps above.
Every door we ship reflects 20 years of solid wood processing experience. We operate our own drying, finishing, and aluminum processing workshops. We maintain strict quality control from raw material to final production. And we back every order with engineering support that extends beyond the factory gate.
Send us your project specifications. Our team will provide customized shop drawings and a formal quotation within 24 hours. Whether you need 10 doors for a villa renovation or 500 for a hotel project, we have the capacity and the experience to deliver.
—
References
[1] International Code Council. (2021). Rough Opening Requirements for Doors. https://www.iccsafe.org/
[2] Wood Products Council. (2020). Moisture Content and Wood Movement. https://www.woodworks.org/
[3] Window and Door Manufacturers Association. (2022). Installation Instructions for Pre-Hung Doors. https://www.wdma.com/
[4] U.S. Department of Energy. (2023). Air Sealing and Insulation for Door Openings. https://www.energy.gov/
[5] Architectural Woodwork Institute. (2019). Quality Standards for Factory Finishing. https://www.awinet.org/